Fried Cheese Balls
Last Friday afternoon, the rain came in steady drizzles. My youngest had just finished building a lopsided Lego castle on the kitchen floor, and I needed something cozy. Something hot. Something cheesy. I remembered those golden little cheese balls I used to make during my first year of marriage—back when my husband and I barely had matching plates, but we had butter, breadcrumbs, and love.
So I got to work, one hand rolling balls while the other helped with homework spelling words like “crispy” and “melt.” When that first batch hit the oil and started sizzling, the entire kitchen smelled like comfort. That’s what this snack is for me now—a crispy, creamy reminder that joy doesn’t need to be complicated.
And honestly? Watching my kids burn their tongues because they couldn’t wait—classic.
Short Description
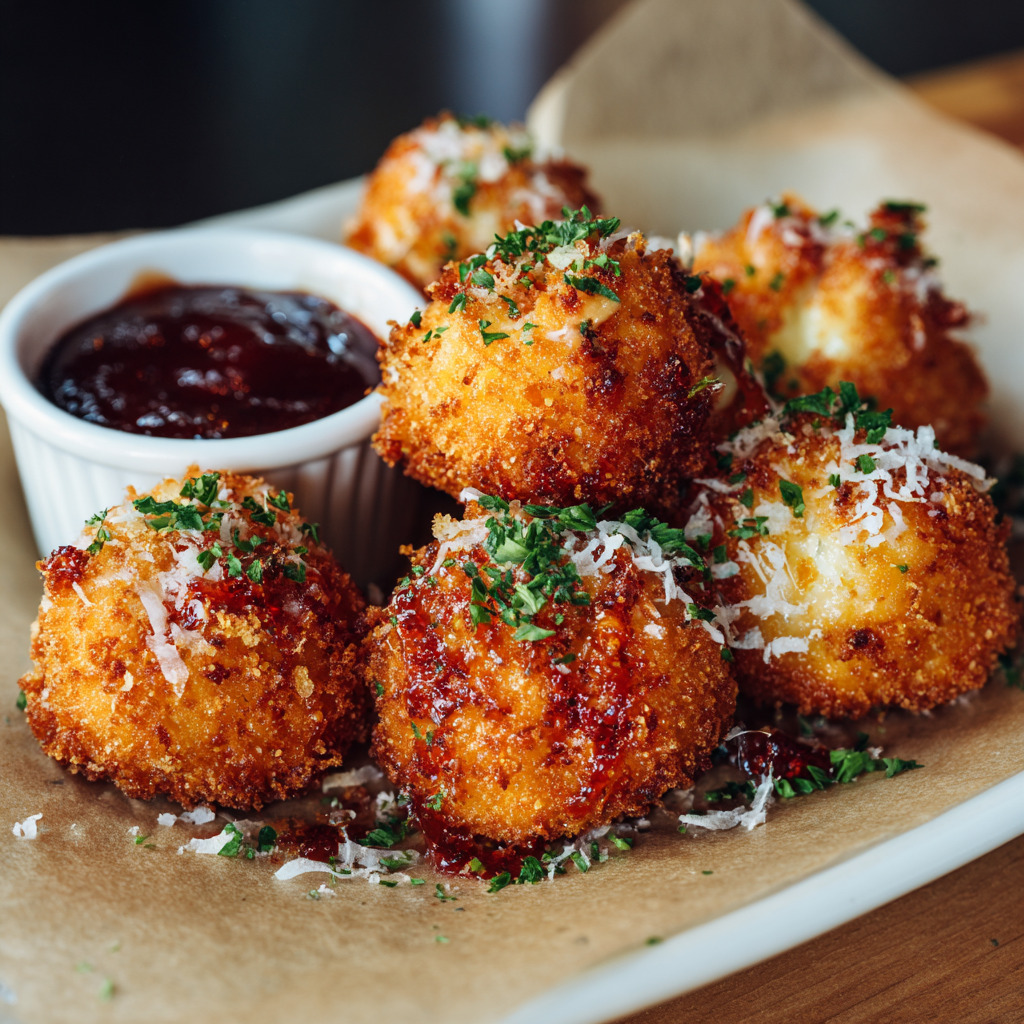
Fried cheese balls are crispy, golden bites filled with gooey, melty cheese—perfect as an appetizer, snack, or party treat. Easy to make, crowd-pleasing, and irresistibly addictive.
Ingredients
For the Cheese Balls
- 200g mozzarella cheese (low-moisture block, cut into ¾-inch cubes)
- 1 cup all-purpose flour
- 2 large eggs
- 1½ cups panko breadcrumbs (or regular breadcrumbs)
Seasonings and Optional Add-ins
- ½ tsp garlic powder
- ¼ tsp smoked paprika
- Salt and pepper to taste
- Optional: 2 tbsp grated parmesan for extra flavor
- Optional: finely chopped parsley for garnish
Suggested Substitutions
- Vegan? Use vegan mozzarella and flax egg (1 tbsp ground flax + 3 tbsp water)
- Gluten-free? Swap flour and breadcrumbs for GF alternatives
Tools Needed
- Mixing bowls
- Slotted spoon
- Deep fryer or heavy-bottomed pot
- Tongs or spider strainer
- Paper towels for draining
Step-by-Step Cooking Instructions
Step 1: Prep the Cheese Cubes
Cut your mozzarella into even cubes—around ¾ inch each. Keep them cold until ready to coat. This helps reduce melting during frying.
Step 2: Set Up Your Coating Station
Place flour in one bowl. Beat eggs in a second bowl. Mix breadcrumbs with garlic powder, paprika, salt, and pepper in a third.
Step 3: Coat the Cheese
Dip each cube first in flour, then egg, then breadcrumbs. For a crispier crust, double coat: repeat egg and breadcrumb dip once more.
Step 4: Chill the Balls
Place coated cheese balls on a tray and refrigerate for 20–30 minutes. This helps the coating stay on during frying.
Step 5: Heat the Oil
Pour oil into a pot, about 2 inches deep. Heat to 350°F (175°C). Test with a breadcrumb—it should sizzle on contact.
Step 6: Fry in Batches
Carefully lower balls into the oil using a slotted spoon. Fry 4–6 at a time for 2–3 minutes, until golden brown and crisp.
Step 7: Drain and Serve
Remove with tongs and place on paper towels. Let them rest for 1–2 minutes. Sprinkle chopped parsley on top and serve hot.
Pro Tip: Never overcrowd the oil. Too many at once lowers the temperature and leads to soggy results.
Why You’ll Love This Recipe
- Crunchy outside, molten inside—classic texture contrast
- Super quick to prep, especially with store-bought cheese
- Great for kids, parties, and movie night munchies
- Customizable with herbs, seasonings, and dipping sauces
- Freezer-friendly—batch ahead, fry on demand
Helpful Tips and Cooking Notes
Let the cheese chill—literally. Cold cheese is easier to coat and less likely to melt too quickly in the hot oil. If you’re short on time, pop the cheese balls in the freezer for 10–15 minutes before frying.
Double-coating gives a thick, satisfying crunch and protects that melty center. Just be sure to press the breadcrumbs in gently so they stick well during frying.
Keep your oil at 350°F for even browning. If it’s too low, the coating absorbs oil and turns greasy. Too high, and the outside burns before the cheese inside softens.
Planning ahead? Coat the cheese balls in the morning and fry them up just before guests arrive. They also freeze like a dream—just line them up on a tray, freeze, and transfer to a zip-top bag. Fry straight from frozen with a few seconds added to the cooking time.
Nutritional Benefits & Fun Facts
Cheese might get a bad rap sometimes, but mozzarella packs a solid amount of protein and calcium, especially great for growing kids or snack-happy adults. Just keep portions in check—it’s rich and satisfying even in small bites.
Here’s a fun fact: panko breadcrumbs, now a pantry staple, originated from Japanese tank crews during WWII using electric current to bake bread without crust. That crustless, flaky texture was later ground into the airy crumbs we now know and love. Wild, right?
Final Dish & Serving Suggestions
These cheese balls come out golden, round, and full of personality. The crust shatters slightly with each bite, giving way to molten cheese that stretches just long enough to make you smile. Serve them with marinara, honey mustard, or a quick homemade ranch. Add fresh veggies on the side for balance, or stuff into sliders for something fun.
For parties, stack them on skewers or nestle into a grazing board. Kids will chase them, adults will hoard them.
Storage and Reheating Tips
- Store any leftovers in an airtight container in the fridge for up to 3 days
- Reheat in a preheated oven at 375°F for 6–8 minutes or until the crust is re-crisped
- Avoid microwaving—they’ll get soggy fast
- Freeze before frying for up to 1 month. Fry from frozen, just add an extra 30 seconds
Frequently Asked Questions (FAQs)
1. Can I bake these instead of frying?
Yes, you can bake them at 400°F for 12–15 minutes. They won’t be quite as crispy as fried ones, but they still taste great—just make sure to flip halfway through for even browning.
2. What oil is best for frying cheese balls?
Neutral, high-smoke point oils like canola, vegetable, or peanut oil are your safest bets. They keep the flavor clean and the crust crisp without burning.
3. How do I prevent them from bursting?
Always use low-moisture mozzarella, coat them completely, and chill before frying. If your oil is too hot or the cheese is too soft, they’re more likely to split.
4. Can I add fillings like jalapeños or bacon?
Absolutely. I’ve stuffed tiny bits of cooked bacon or diced jalapeños into the cheese cubes before coating—just press them in gently so they stay put.
5. Are these good for meal prep?
Yes. You can coat them, freeze them uncooked, and then fry them straight from frozen whenever the craving hits. They stay crisp and gooey—perfect for spontaneous snacks.
Final Thoughts
This recipe reminds me how little things—like cheese, breadcrumbs, and a bit of hot oil—can bring so much happiness to a day. I love serving these on lazy Sundays or when friends pop in unexpectedly. If you try them, let me know what dip you paired them with or how your kids reacted to that gooey first bite.
Drop a comment, pin it for later, or tag me if you share on socials—I’d love to see your version!
Fried Cheese Balls
Course: AppetizersDifficulty: Easy4
servings20
minutes15
minutes310
kcal35
minutesFried cheese balls are crispy, golden bites filled with gooey, melty cheese—perfect as an appetizer, snack, or party treat. Easy to make, crowd-pleasing, and irresistibly addictive.
Ingredients
- For the Cheese Balls
200g mozzarella cheese (low-moisture block, cut into ¾-inch cubes)
1 cup all-purpose flour
2 large eggs
1½ cups panko breadcrumbs (or regular breadcrumbs)
- Seasonings and Optional Add-ins
½ tsp garlic powder
¼ tsp smoked paprika
Salt and pepper to taste
Optional: 2 tbsp grated parmesan for extra flavor
Optional: finely chopped parsley for garnish
- Suggested Substitutions
Vegan? Use vegan mozzarella and flax egg (1 tbsp ground flax + 3 tbsp water)
Gluten-free? Swap flour and breadcrumbs for GF alternatives
Directions
- Cut your mozzarella into even cubes—around ¾ inch each. Keep them cold until ready to coat. This helps reduce melting during frying.
- Place flour in one bowl. Beat eggs in a second bowl. Mix breadcrumbs with garlic powder, paprika, salt, and pepper in a third.
- Dip each cube first in flour, then egg, then breadcrumbs. For a crispier crust, double coat: repeat egg and breadcrumb dip once more.
- Place coated cheese balls on a tray and refrigerate for 20–30 minutes. This helps the coating stay on during frying.
- Pour oil into a pot, about 2 inches deep. Heat to 350°F (175°C). Test with a breadcrumb—it should sizzle on contact.
- Carefully lower balls into the oil using a slotted spoon. Fry 4–6 at a time for 2–3 minutes, until golden brown and crisp.
- Remove with tongs and place on paper towels. Let them rest for 1–2 minutes. Sprinkle chopped parsley on top and serve hot.
Notes
- Never overcrowd the oil. Too many at once lowers the temperature and leads to soggy results.