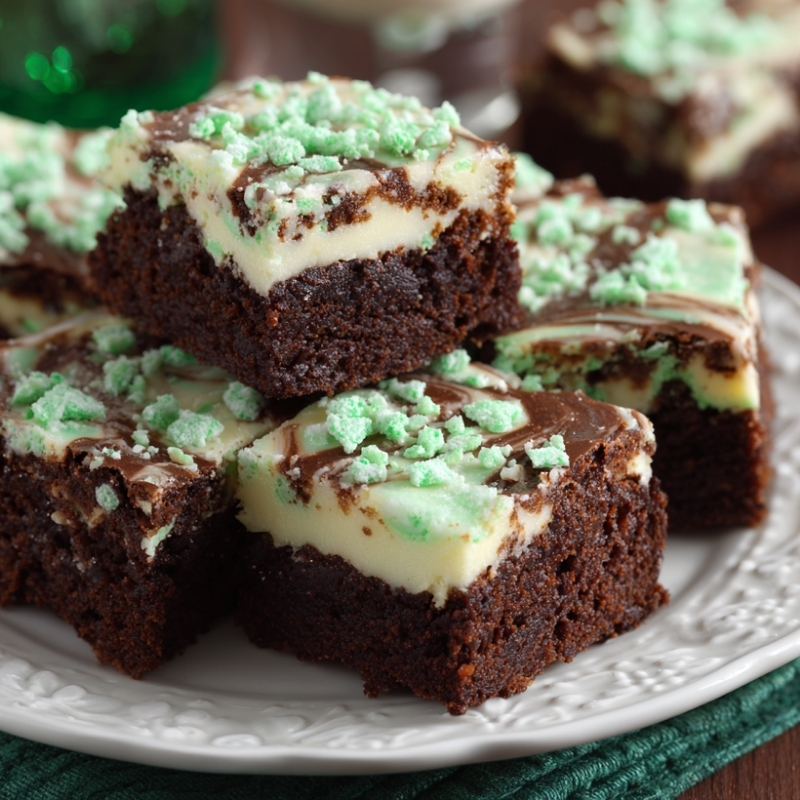
St. Patrick’s Lucky Mint Brownie Bites
Saturday morning brunch energy hums through my best friend’s apartment, the kind where everyone arrives early but no one is in a rush. A grocery bag sits on the counter with mint candies poking through the top, and her kid keeps asking if green desserts actually taste different.
I promise they don’t, but secretly I like how the color changes expectations. Brownies feel familiar. Mint shifts them into celebration mode. The oven preheats while coffee brews too strong, and someone opens a window to let spring air creep in. This recipe comes together fast, which feels right for a holiday that never takes itself too seriously.
The batter turns glossy and dark, then the cream cheese swirl lightens it in soft ribbons. A few drops of green are enough. Nothing loud. When the pan goes into the oven, the room settles. By the time the brownies cool, the table is already set, and the bites disappear quicker than planned. That feels like success.
Short Description
Rich, fudgy mint brownie bites swirled with creamy vanilla cheesecake and topped with crushed mint candies for a festive St. Patrick’s Day treat.
Key Ingredients
- ½ cup unsweetened cocoa powder
- ¾ cup all-purpose flour
- 1 cup granulated sugar
- ½ cup unsalted butter, melted
- 2 large eggs, room temperature
- 1 teaspoon peppermint extract
- ½ teaspoon vanilla extract
- ¼ teaspoon salt
- ½ teaspoon baking powder
- 2 oz cream cheese, softened
- ½ cup powdered sugar
- A few drops green food coloring, optional
- 2 tablespoons crushed mint candies or Andes mints
Tools Needed
- 8×8 inch baking pan
- Parchment paper
- Mixing bowls
- Whisk
- Rubber spatula
- Small knife or skewer
- Wire cooling rack
Cooking Instructions
Step 1: Prepare the Pan and Oven
Preheat the oven to 350°F. Line an 8×8 inch pan with parchment paper, leaving overhang on two sides for easy lifting later.
Step 2: Mix the Dry Ingredients
In a medium bowl, sift together cocoa powder, flour, baking powder, and salt. Whisk gently to remove lumps and set aside.
Step 3: Build the Brownie Batter
In a large bowl, whisk granulated sugar and melted butter until glossy and smooth. Add the eggs one at a time, mixing well after each addition. Stir in peppermint extract and vanilla extract until evenly combined.
Step 4: Combine Wet and Dry
Fold the dry ingredients into the wet mixture using a spatula. Stop as soon as the batter comes together. It should look thick and fudgy. Overmixing can make the brownies dense.
Step 5: Make the Cream Cheese Swirl
In a small bowl, beat the softened cream cheese with powdered sugar and green food coloring until smooth and creamy. Adjust color slowly for a soft mint shade.
Step 6: Layer and Swirl
Spread half of the brownie batter evenly into the prepared pan. Dollop half of the cream cheese mixture over the top and gently swirl using a knife. Repeat with remaining batter and cream cheese, creating soft marbled patterns.
Step 7: Add the Topping
Sprinkle crushed mint candies evenly over the surface. Press lightly so they stick without sinking.
Step 8: Bake and Cool
Bake for 25 to 30 minutes. Check at 25 minutes with a toothpick. It should come out with a few moist crumbs, not wet batter. Cool completely in the pan on a wire rack before lifting out and cutting into 1½ inch bites.
Why You’ll Love This Recipe
Balanced Mint Flavor: Cool peppermint without overpowering the chocolate.
Fudgy Texture: Soft centers with just enough structure to hold clean bites.
Holiday Ready: Festive color and flavor with minimal effort.
Small Batch Friendly: Perfect for sharing without leftovers lingering too long.
Visually Fun: Swirls and candy topping add instant charm.
Mistakes to Avoid & Solutions
Dry Brownies: Baking too long dries them out. Check early and remove once moist crumbs appear.
Overpowering Mint: Peppermint extract is strong. Measure carefully to avoid a toothpaste taste.
Runny Swirl: If cream cheese is too soft, chill it briefly before mixing.
Uneven Layers: Spread batter gently to keep swirls distinct.
Sticky Cutting: Warm the knife in hot water and wipe clean between cuts.
Serving and Pairing Suggestions
Serve on a platter with fresh berries for contrast.
Pair with hot coffee, mint tea, or cold milk.
Ideal for buffet tables, party trays, or casual dessert boards.
Stack bites on parchment for a relaxed presentation.
Storage and Reheating Tips
Store in an airtight container in the refrigerator for up to 4 days.
Let sit at room temperature for 10 minutes before serving for best texture.
Avoid reheating to keep the cream cheese swirl intact.
Freeze individual bites for up to 1 month and thaw overnight in the fridge.
FAQs
1. Can I skip the food coloring?
Yes. The brownies will taste the same without it.
2. Can I use mint chocolate chips instead?
Yes. Replace crushed candies with ¼ cup mint chips folded into the batter.
3. Why are my brownies cakey?
Too much mixing or extra flour can change the texture. Fold gently and measure accurately.
4. Can these be doubled?
Yes. Use a 9×13 inch pan and increase bake time by about 5 minutes.
5. Do these need refrigeration?
Yes. The cream cheese swirl keeps best when chilled.
Tips & Tricks
Sift cocoa powder to avoid bitter pockets.
Use gel food coloring for better color control.
Chill before slicing for cleaner edges.
Crush mint candies finely for even distribution.
Recipe Variations
Mint Chocolate Chip Brownie Bites
Replace crushed mint candies with ¼ cup mint chocolate chips. Fold chips into the top batter layer before baking for bursts of chocolate.
Espresso Mint Brownies
Add 1 teaspoon instant espresso powder to the dry ingredients. Flavor becomes deeper with a subtle coffee note.
Dark Chocolate Mint Swirl
Swap cocoa powder with dark cocoa and use dark chocolate mint candies. Results are richer and less sweet.
Final Thoughts
By the time the last brownie bite disappears, the table looks messier in the best way. Plates stacked. Candy crumbs scattered. Someone asks for the recipe while wiping chocolate from their fingers. These brownies don’t demand attention, they earn it quietly. They feel playful without trying too hard.
The mint stays cool, the chocolate stays deep, and the swirl keeps things interesting. Baking them feels relaxed, not precious. That’s exactly the mood St. Patrick’s Day needs. A small celebration, shared easily, and gone before you overthink it.
St. Patrick’s Lucky Mint Brownie Bites
Course: DessertDifficulty: Easy16
servings20
minutes30
minutes1
hourRich, fudgy mint brownie bites swirled with creamy vanilla cheesecake and topped with crushed mint candies for a festive St. Patrick’s Day treat.
Ingredients
½ cup unsweetened cocoa powder
¾ cup all-purpose flour
1 cup granulated sugar
½ cup unsalted butter, melted
2 large eggs, room temperature
1 teaspoon peppermint extract
½ teaspoon vanilla extract
¼ teaspoon salt
½ teaspoon baking powder
2 oz cream cheese, softened
½ cup powdered sugar
A few drops green food coloring, optional
2 tablespoons crushed mint candies or Andes mints
Directions
- Preheat the oven to 350°F and line an 8×8 inch pan with parchment paper, leaving an overhang on two sides for easy removal later.
- In a medium bowl, sift together the cocoa powder, flour, baking powder, and salt. Whisk briefly to remove any lumps, then set aside.
- In a large bowl, whisk the granulated sugar and melted butter until smooth and glossy. Add the eggs one at a time, mixing well after each addition. Stir in the peppermint extract and vanilla until evenly combined.
- Gently fold the dry ingredients into the wet mixture using a spatula. Stop as soon as the batter comes together. It should be thick and fudgy. Avoid overmixing to keep the brownies tender.
- In a small bowl, beat the softened cream cheese with the powdered sugar and green food coloring until smooth and creamy. Add the coloring gradually for a soft mint tone.
- Spread half of the brownie batter evenly into the prepared pan. Spoon half of the cream cheese mixture over the top and gently swirl with a knife. Repeat with the remaining batter and cream cheese, creating light marbled patterns.
- Sprinkle the crushed mint candies evenly over the surface, pressing them lightly so they stay in place.
- Bake for 25 to 30 minutes, checking at 25 minutes. A toothpick should come out with a few moist crumbs, not wet batter. Let the brownies cool completely in the pan on a wire rack before lifting out and cutting into 1½ inch bites.