Dreamy Irish Cream Oreo Truffles
The grocery store was louder than usual that afternoon. Carts bumping, a kid arguing over cereal, a cashier humming off key. I had stopped by after work with no plan beyond buying coffee filters, but a small St. Patrick’s Day display near the checkout pulled me in. Green ribbons, shamrock sprinkles, and a stack of Oreos that looked almost intentional.
A woman next to me laughed and said she always overbuys sweets this time of year and regrets nothing. That line stayed with me all the way home. Later that night, my tiny kitchen felt calm again. Just the counter, the food processor, and a box of Oreos waiting to be turned into something better.
I wasn’t testing a recipe for a client or styling for photos yet. This was a quiet, low stakes experiment. Something playful. Something fast. Truffles felt right. Rich, no bake, and just polished enough to feel special.
When the Baileys went in, the filling turned silky and smelled faintly like vanilla and cocoa. By the time I rolled the last one, I already knew these would disappear quickly.
Short Description
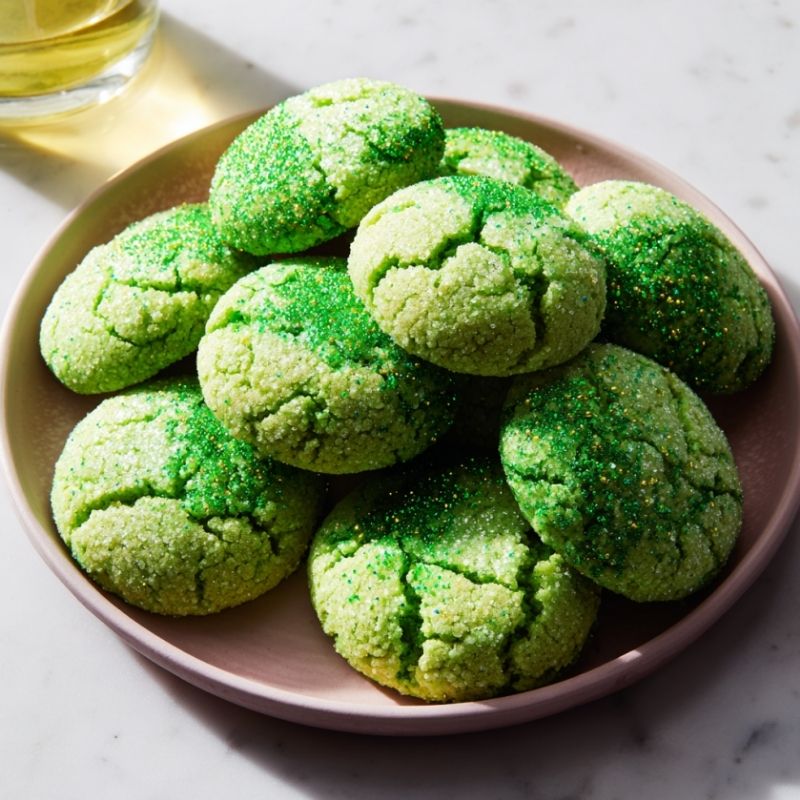
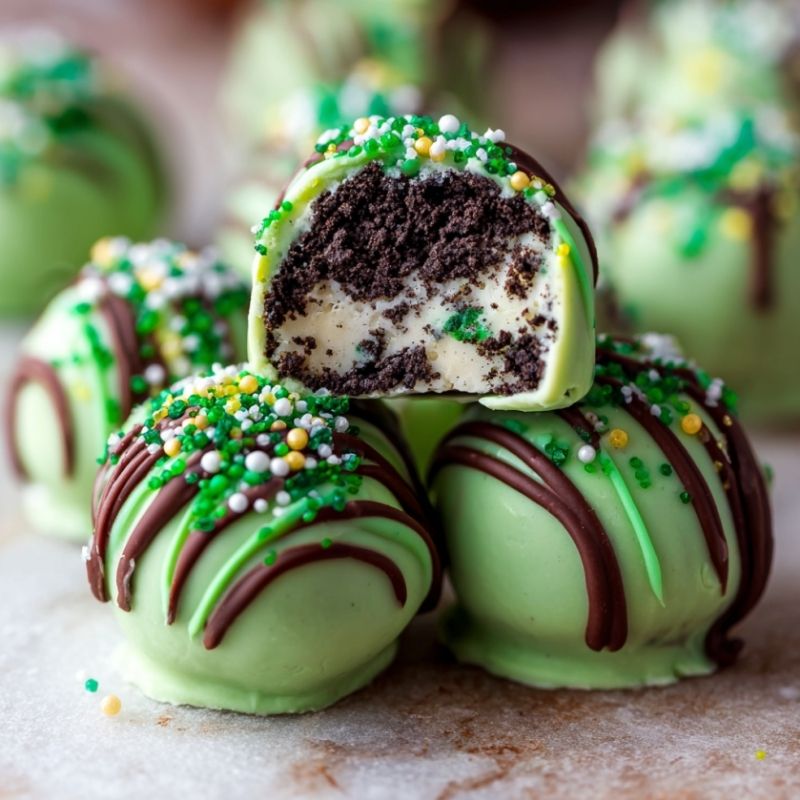
These lush Irish Cream Oreo Truffles are rich, creamy no bake treats made with crushed Oreos, smooth cream cheese, and a splash of Irish cream, dipped in green chocolate for a festive finish.
Key Ingredients
- 36 Oreo cookies, with cream filling, 14.3 oz package
- 8 oz cream cheese, softened
- 1 to 2 tbsp Baileys Irish Cream liqueur
For the Coating
- 12 oz green candy melts or white chocolate melting wafers
- 2 to 3 drops green gel food coloring if using white chocolate
- 1 tsp coconut oil or shortening, optional
For Decoration
- Green, white, and orange sprinkles
- Optional gold dust, shamrock candies, or crushed candy
Non Alcoholic Option
- Replace Baileys with 1 tsp vanilla extract or almond extract
Tools Needed
- Food processor or rolling pin and zip top bag
- Large mixing bowl
- Rubber spatula
- Parchment paper
- Baking sheet
- Fork or dipping tool
- Microwave safe bowl
Cooking Instructions
Step 1: Crush the Oreos
Place the Oreo cookies, including the cream filling, into a food processor. Pulse until the crumbs are very fine and uniform. The texture should look like damp sand. If working by hand, seal the cookies in a zip top bag and crush firmly with a rolling pin until no chunks remain.
Step 2: Mix the Filling
Transfer the Oreo crumbs to a large bowl. Add the softened cream cheese and 1 tbsp Baileys Irish Cream. Mix with a rubber spatula until the mixture becomes smooth, cohesive, and dough like. If it feels dry or crumbly, add an additional ½ to 1 tbsp Baileys until pliable.
Step 3: Chill the Mixture
Cover the bowl with plastic wrap and refrigerate for 30 minutes. The mixture should feel firm to the touch but still easy to scoop. This step is key for clean, even truffles.
Step 4: Roll the Truffles
Scoop about 1 tbsp of the chilled mixture and roll it gently between your palms to form smooth balls. Place each truffle onto a parchment lined baking sheet. You should end up with around 24 evenly sized truffles.
Step 5: Firm Up Before Dipping
Freeze the truffles for 15 to 20 minutes or refrigerate for 30 to 45 minutes until very firm. When ready, they should hold their shape easily when picked up.
Step 6: Melt the Coating
Add the candy melts or white chocolate wafers to a microwave safe bowl. Microwave in 30 second intervals, stirring well after each round, until fully melted and smooth. If using white chocolate, stir in green gel food coloring. Add coconut oil if the coating feels too thick.
Step 7: Dip the Truffles
Drop one truffle at a time into the melted chocolate. Use a fork to lift it out, gently tapping the fork against the bowl to remove excess coating. Slide the truffle back onto the parchment lined sheet.
Step 8: Decorate While Wet
Immediately sprinkle the truffles with green, white, and orange sprinkles or optional decorations. The coating sets quickly, so work in small batches.
Step 9: Set the Coating
Let the truffles sit at room temperature for 15 to 20 minutes, or refrigerate for 10 minutes, until the coating is fully hardened and glossy.
Step 10: Serve and Enjoy
Serve the truffles chilled or at room temperature. The finished texture should have a clean snap on the outside with a soft, creamy center inside. Perfect for St. Patrick’s Day gatherings or gifting.
Why You’ll Love This Recipe
Rich and creamy texture with deep chocolate flavor
No baking required, just mix, chill, and dip
Perfect for parties, gifting, or last minute desserts
Easy to customize with flavors and decorations
Small portions that feel indulgent without being heavy
Mistakes to Avoid & Solutions
Filling too soft to roll: This usually means the cream cheese was too warm. Chill the mixture longer, up to 45 minutes, before rolling.
Truffles cracking when dipped: Cracks happen when truffles are too cold and the chocolate is too hot. Let frozen truffles sit at room temperature for 2 minutes before dipping.
Thick, clumpy coating: Add 1 tsp coconut oil or shortening and stir well to thin the chocolate.
Chocolate setting too fast: Work in smaller batches and keep the bowl of melted chocolate warm by microwaving for 10 seconds as needed.
Decorations not sticking: Sprinkle immediately after dipping. Once the coating starts to dull, it will not hold toppings.
Serving and Pairing Suggestions
Arrange on a white platter for contrast and a clean look
Serve as part of a dessert board with fresh berries
Pair with hot coffee, espresso, or Irish cream hot cocoa
Perfect for buffet tables, gift boxes, or plated desserts
Storage and Reheating Tips
Store truffles in an airtight container in the refrigerator for up to 5 days
Separate layers with parchment paper to prevent sticking
Do not reheat. Let chilled truffles sit at room temperature for 10 minutes before serving for the best texture
Truffles can be frozen for up to 1 month. Thaw overnight in the fridge
FAQs
1. Can I make these without alcohol?
Yes. Replace Baileys with 1 tsp vanilla or almond extract. The flavor stays rich and balanced.
2. Do I need a food processor?
No. A rolling pin and zip top bag work fine. Just crush until very fine.
3. Why did my truffles fall apart when dipping?
They were likely not chilled enough. Freeze them longer until very firm.
4. Can I use dark chocolate instead of candy melts?
Yes. Use high quality melting wafers and add coconut oil for smooth dipping.
5. How far ahead can I make these?
They can be made up to 2 days ahead and stored in the fridge until serving.
Tips & Tricks
Slightly damp hands make rolling smoother
Use a fork and toothpick together for cleaner dipping
Chill decorations so they hold their color and shape
Wipe the fork between dips for a neater finish
Recipe Variations
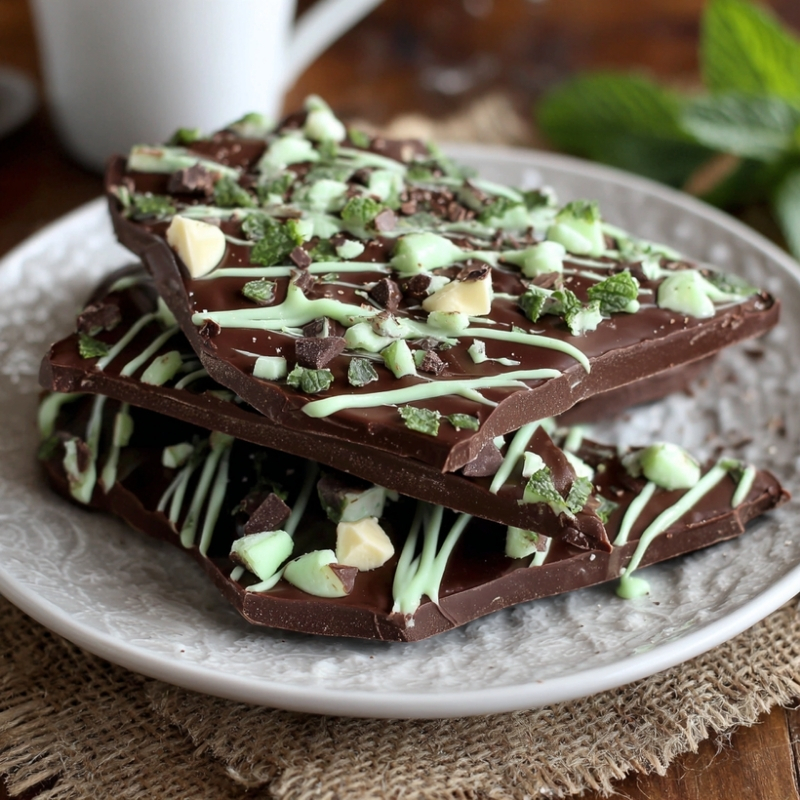
Mint Irish Cream Truffles: Add ¼ tsp peppermint extract to the filling. Use dark chocolate coating for contrast. Flavor is cool, rich, and classic.
Orange Chocolate Truffles: Add 1 tsp orange zest to the filling. Coat in white chocolate with green and orange sprinkles. Bright and slightly citrusy.
Espresso Oreo Truffles: Add 1 tsp instant espresso powder to the Oreo crumbs before mixing. Deep, bold flavor that pairs well with coffee.
Vegan Version: Use dairy free sandwich cookies, vegan cream cheese, and dairy free chocolate. Replace Baileys with vanilla extract.
Final Thoughts
By the time I packed these truffles into a small box, the kitchen was quiet again. The mess was minimal, which always feels like a win. A few smudges of green chocolate on the counter, nothing more. I handed a couple to a neighbor later that evening and watched her smile before she even took a bite.
That reaction is why I love simple desserts like this. They do not ask for much, yet they give back generously. These truffles feel festive without trying too hard. Just rich, playful, and polished enough to feel intentional. They fit into busy weeks and spontaneous plans. The kind of recipe that slides easily into real life and stays there.
Dreamy Irish Cream Oreo Truffles
Course: DessertDifficulty: Easy24
servings20
minutes1
hourThese lush Irish Cream Oreo Truffles are rich, creamy no bake treats made with crushed Oreos, smooth cream cheese, and a splash of Irish cream, dipped in green chocolate for a festive finish.
Ingredients
36 Oreo cookies, with cream filling, 14.3 oz package
8 oz cream cheese, softened
1 to 2 tbsp Baileys Irish Cream liqueur
For the Coating
12 oz green candy melts or white chocolate melting wafers
2 to 3 drops green gel food coloring if using white chocolate
1 tsp coconut oil or shortening, optional
For Decoration
Green, white, and orange sprinkles
Optional gold dust, shamrock candies, or crushed candy
Non Alcoholic Option
Replace Baileys with 1 tsp vanilla extract or almond extract
Directions
- Place the Oreo cookies, including the cream filling, into a food processor and pulse until very fine and uniform, resembling damp sand. If crushing by hand, seal the cookies in a zip top bag and roll firmly until no chunks remain.
- Transfer the crumbs to a large bowl. Add the softened cream cheese and 1 tbsp Baileys Irish Cream, mixing until smooth and dough like. If the mixture feels dry or crumbly, add another ½ to 1 tbsp Baileys until pliable.
- Cover the bowl and refrigerate for 30 minutes, just until the mixture is firm but still easy to scoop. This helps the truffles hold their shape.
- Scoop about 1 tbsp of the chilled mixture and roll gently between your palms to form smooth balls. Arrange on a parchment lined baking sheet, yielding about 24 truffles.
- Freeze for 15 to 20 minutes or refrigerate for 30 to 45 minutes until very firm and easy to handle.
- Place the candy melts or white chocolate wafers in a microwave safe bowl. Heat in 30 second intervals, stirring well between each round, until completely smooth. Add green food coloring if using white chocolate and coconut oil if the coating feels thick.
- Dip each truffle into the melted coating, lifting it out with a fork and tapping gently to remove excess. Return to the parchment lined sheet.
- Immediately decorate with sprinkles or toppings before the coating sets. Work in small batches for best results.
- Let the truffles set at room temperature for 15 to 20 minutes or refrigerate for 10 minutes until the coating is firm and glossy.
- Serve chilled or at room temperature. The outside should snap cleanly, revealing a soft, creamy center, perfect for St. Patrick’s Day treats or gifting.