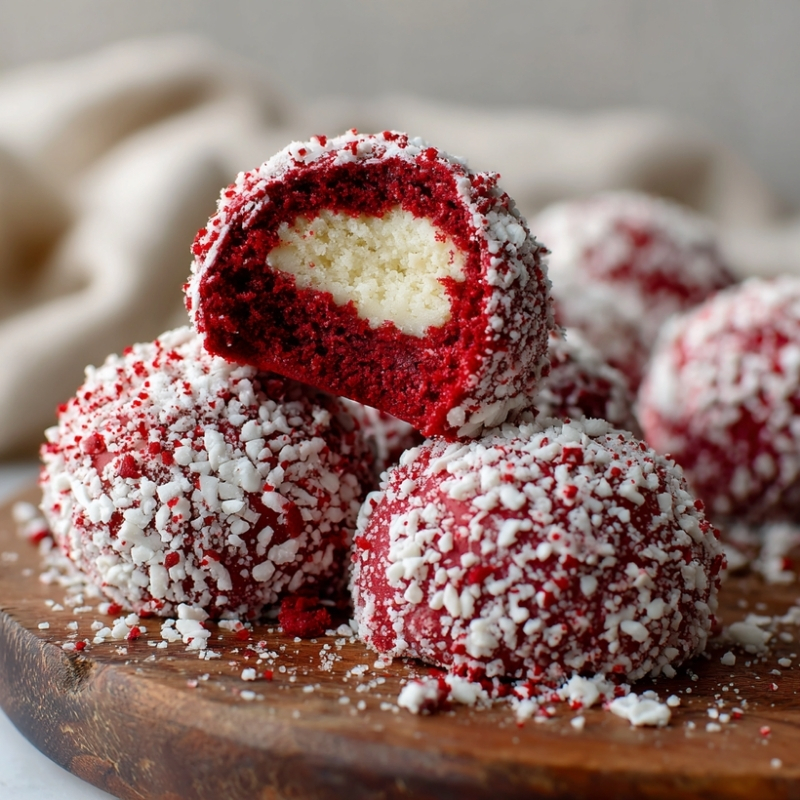
Red Velvet Snowball Cookies With White Chocolate Filling
A rainy afternoon in my friend Lila’s tiny apartment kitchen is where these Red Velvet Snowball Cookies first came to life. She had invited me over during one of those late-spring storms where the sky can’t decide if it wants to mist or pour.
Her place is one of those narrow city apartments with a window barely bigger than a notebook, yet it always smells like vanilla because she burns candles like it’s her part-time job. We were supposed to “catch up,” but as usual, we drifted into baking because that’s what happens when two food people hang out within ten feet of an oven.
The moment she mentioned craving something cozy but pretty enough for her office potluck, I saw a bowl of shredded coconut on her counter, and my brain went straight to snowballs. Red velvet has been one of my comfort flavors ever since I began styling food professionally, mostly because that shade of red looks dramatic in photos without needing much decoration. The two ideas collided, and suddenly we were rummaging through her cabinets like contestants in a cooking challenge.
There was this brief pause when we pulled the tray out of the oven—soft domes, warm and tender—and we both instinctively broke one open. The white chocolate center stretched like a tiny ribbon, and that was the moment we knew we hit something special. Simple, a little whimsical, and unfairly photogenic. Perfect for the busy, the lazy, and anyone who wants a plate of cookies that quietly flexes on the dessert table.
Short Description
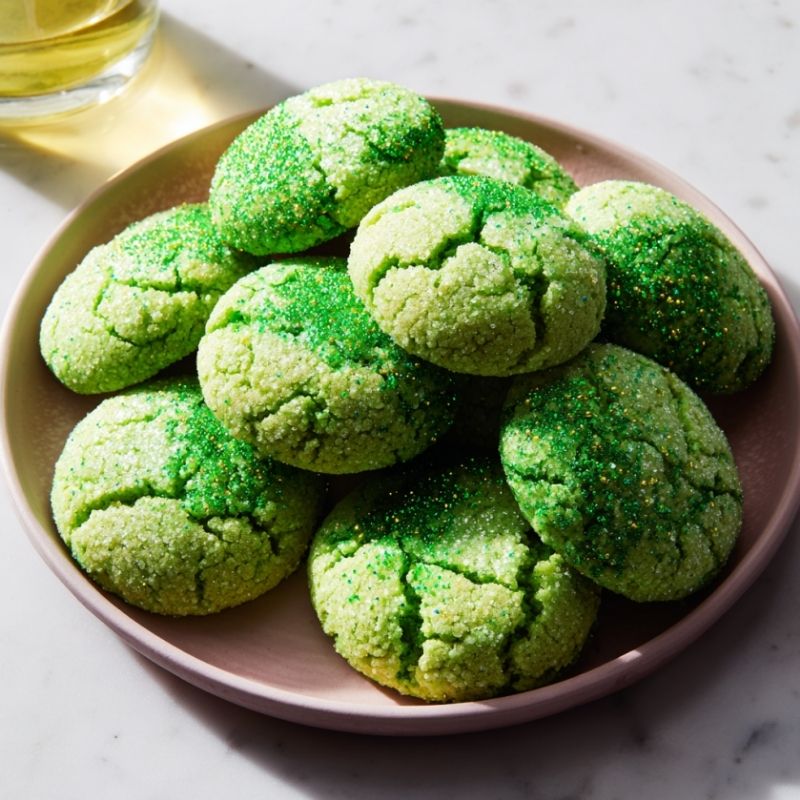
Red Velvet Snowball Cookies are soft, tender red velvet bites filled with melted white chocolate and rolled in snowy coconut flakes. Each cookie stays cute, round, and slightly gooey in the center.
Key Ingredients
For the cookies
- 1 ½ cups all-purpose flour
- ¼ cup unsweetened cocoa powder
- 1 tsp baking powder
- ¼ tsp salt
- ½ cup unsalted butter, softened
- ¾ cup granulated sugar
- 1 large egg
- 1 tsp vanilla extract
- 1 tbsp red food coloring (gel or liquid)
- ¼ cup buttermilk
- ½ cup white chocolate chips (for filling)
- sugar syrup (to help coconut stick)
- ½ cup shredded coconut (for coating)
Tools Needed
- Hand mixer or stand mixer
- Mixing bowls
- Baking sheet
- Parchment paper
- Cooling rack
- Measuring cups and spoons
- Small cookie scoop (optional)
Cooking Instructions
Step 1: Preheat the Oven
Set the oven to 350°F (175°C). Line a baking sheet with parchment paper so the cookies release cleanly.
Step 2: Whisk Dry Ingredients
In a medium bowl, whisk the flour, cocoa powder, baking powder, and salt until everything looks uniform.
Step 3: Cream Butter and Sugar
In a large bowl, beat the softened butter and granulated sugar on medium speed for about 2 to 3 minutes. The mixture should look pale, fluffy, and slightly airy.
Step 4: Add Egg and Flavorings
Beat in the egg, vanilla extract, and red food coloring. Mix until the color is even.
Step 5: Combine Wet and Dry Ingredients
Add the dry ingredients in portions, alternating with the buttermilk. Start with the dry mix, then buttermilk, and finish with dry. Mix until just combined. If the dough feels too sticky, chill slightly before adjusting with 1 tbsp flour.
Step 6: Chill the Dough
Cover the bowl and refrigerate the dough for at least 30 minutes. This helps the cookies keep their shape.
Step 7: Shape and Fill
Scoop out about 1 tbsp of dough and roll it into a ball. Press your thumb into the center to make space, then tuck in 2 to 3 white chocolate chips (or up to 5 if they’re small). Seal the dough and roll it back into a ball. Make sure no chocolate peeks through.
Step 8: Bake
Arrange the dough balls on the baking sheet with a little space between each. Bake for 10 to 12 minutes or until the edges look set. They’ll be slightly flat on the bottom but remain round overall.
Step 9: Coat With Coconut
Let the cookies cool for a few minutes. Brush the warm tops lightly with water or a thin layer of sugar syrup. Roll each cookie in shredded coconut so it sticks evenly.
Step 10: Cool and Enjoy
Cool for 5 minutes on the baking sheet, then move to a wire rack. Serve warm for that soft, melty white chocolate center.
Why You’ll Love This Recipe
Soft center with a creamy white chocolate surprise
Easy to make and even easier to style beautifully
No complex decorating required
Ideal for gifting or holiday platters
Kid-friendly and fun to assemble
Photogenic with minimal effort
Light coconut coating keeps the snowball look fresh
Mistakes to Avoid & Solutions
1. Dough spreading too much
If the cookies flatten too much, the dough was too warm.
Solution: Chill the dough longer, up to 1 hour.
2. White chocolate leaking out
This happens if the dough isn’t sealed well.
Solution: Pinch seams firmly and roll again to smooth the surface.
3. Dry or crumbly cookies
Too much flour is usually the cause.
Solution: Spoon flour into the measuring cup instead of scooping.
4. Coconut not sticking
Dry cookies won’t hold coconut flakes.
Solution: Use a thin brush of sugar syrup to help it adhere.
5. Dull red color
Cocoa powder can mute the color.
Solution: Don’t skip the food coloring; add a little more if needed.
Serving and Pairing Suggestions
Place them in a shallow bowl and dust lightly with extra coconut for a snowy centerpiece.
Pair with peppermint hot chocolate, chai latte, or a warm cup of black tea.
Serve on a dessert platter with brownies, truffles, or mini cheesecakes.
Great for cookie swaps, lunchbox treats, or gifting in small boxes lined with parchment.
Storage and Reheating Tips
Store at room temperature in an airtight container for up to 4 days.
Refrigerate for up to 1 week.
Freeze uncoated cookies for up to 2 months; thaw, then roll in coconut before serving.
Reheat in a low oven at 275°F (135°C) for 3 minutes to soften the center.
FAQs
1. Why are my cookies not staying round?
Chilling time may be too short. Cold dough holds shape better.
2. Can I skip the coconut coating?
Yes. The cookies taste great plain, though you’ll lose the snowball look.
3. Can I use cream cheese filling instead of white chocolate?
You can, but freeze small cream cheese balls first so they don’t melt too quickly.
4. What type of cocoa powder works best?
Natural cocoa powder is fine here; no need for Dutch-process.
5. How do I keep red velvet flavor balanced?
Use the full amount of vanilla and buttermilk to keep the flavor smooth, not dusty.
Tips & Tricks
Use gel food coloring for a stronger shade of red.
Lightly oil your hands to prevent sticking when rolling dough.
Make the dough a day ahead to save time on busy holiday mornings.
For prettier tops, roll the dough until perfectly smooth before baking.
Recipe Variations
White Chocolate Vanilla Bean Filling
Swap regular chips for vanilla bean baking chips.
Fill cookies the same way, but add an extra ½ tsp vanilla extract to the dough for a warmer aroma.
Peppermint Snowball Cookies
Replace vanilla with ½ tsp peppermint extract.
Add crushed peppermint candy into the coconut during coating for a festive crunch.
Double Chocolate Snowballs
Use dark chocolate chips instead of white.
Increase cocoa powder to ⅓ cup and reduce flour by 1 tbsp to keep the texture soft.
Almond Red Velvet Snowballs
Add ½ tsp almond extract to the dough.
Roll in a mix of coconut and finely chopped almonds for extra flavor.
Final Thoughts
Standing in that cozy kitchen with rain tapping the window, these cookies felt like a tiny celebration disguised as a baking experiment. I still remember how Lila insisted on rolling each cookie twice because she wanted the coconut to look “perfectly fluffy,” even though we were both giggling more than focusing.
The warm red velvet, the smooth center, the soft white coating—they turned the gloomy weather into something warmer. It’s funny how a simple cookie can shift the mood of a room and make even a small gathering feel charming.
These are the kinds of recipes that create little pauses in the day, the good kind, the kind you want to stretch out a bit longer. If you make them, I hope they bring that same cozy feeling to your kitchen too.
Red Velvet Snowball Cookies With White Chocolate Filling
Course: DessertDifficulty: Easy20
servings15
minutes10
minutes30
minutesRed Velvet Snowball Cookies are soft, tender red velvet bites filled with melted white chocolate and rolled in snowy coconut flakes. Each cookie stays cute, round, and slightly gooey in the center.
Ingredients
1 ½ cups all-purpose flour
¼ cup unsweetened cocoa powder
1 tsp baking powder
¼ tsp salt
½ cup unsalted butter, softened
¾ cup granulated sugar
1 large egg
1 tsp vanilla extract
1 tbsp red food coloring (gel or liquid)
¼ cup buttermilk
½ cup white chocolate chips (for filling)
sugar syrup (to help coconut stick)
½ cup shredded coconut (for coating)
Directions
- Preheat the oven to 350°F (175°C) and line a baking sheet with parchment paper.
- Whisk the flour, cocoa powder, baking powder, and salt in a medium bowl until evenly combined.
- Beat the softened butter and granulated sugar in a large bowl for 2 to 3 minutes until pale and fluffy.
- Mix in the egg, vanilla, and red food coloring until the batter looks uniform.
- Add the dry ingredients in portions, alternating with the buttermilk, and mix just until combined. If the dough feels too sticky, chill briefly before adding 1 tbsp flour.
- Refrigerate the dough for at least 30 minutes so it firms up.
- Roll about 1 tbsp of dough into a ball, press an indent in the center, and tuck in 2 to 5 white chocolate chips depending on their size. Seal and roll smooth.
- Place on the baking sheet and bake for 10 to 12 minutes until the edges are set and the bottoms lightly flatten.
- Let the cookies cool slightly. Brush with water or a thin sugar syrup and roll in shredded coconut so it sticks evenly.
- Cool for a few minutes on the sheet, transfer to a rack, and enjoy warm for a melty white chocolate center.